Arduino Web Editorの使い方
当記事では、Arduino Web Editorの使い方を詳しく解説します。Arduino Web EditorはWordPressのように、WEBブラウザで動作するWEBアプリケーションになります。
なお、オフラインで使用したい場合は、統合開発環境のArduino IDEをダウンロード・インストールする必要があります。詳しくは以下の記事をご覧ください。


Arduinoアカウント作成・ログイン
まずは、以下のリンクからArduino公式WEBサイトに移動します。
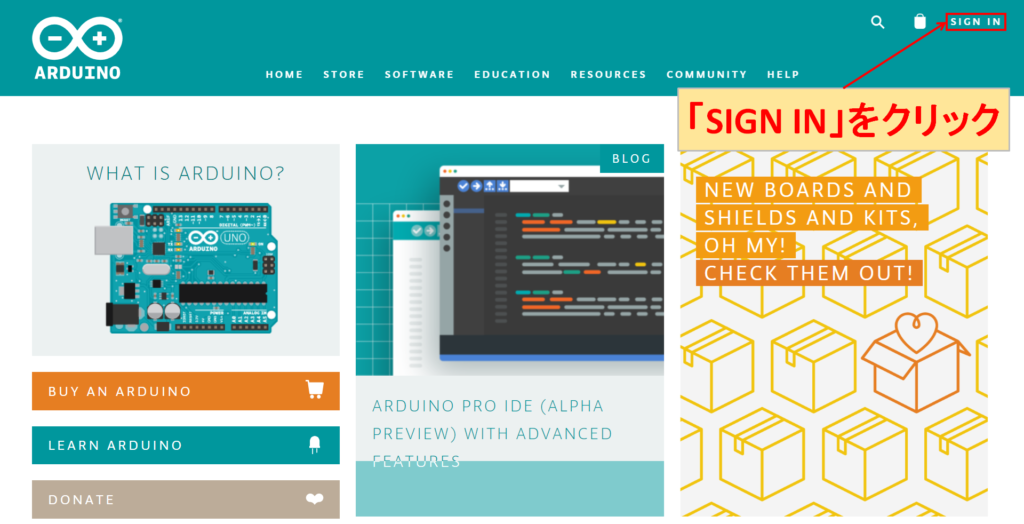
画面右上の「SIGN IN」をクリックします。
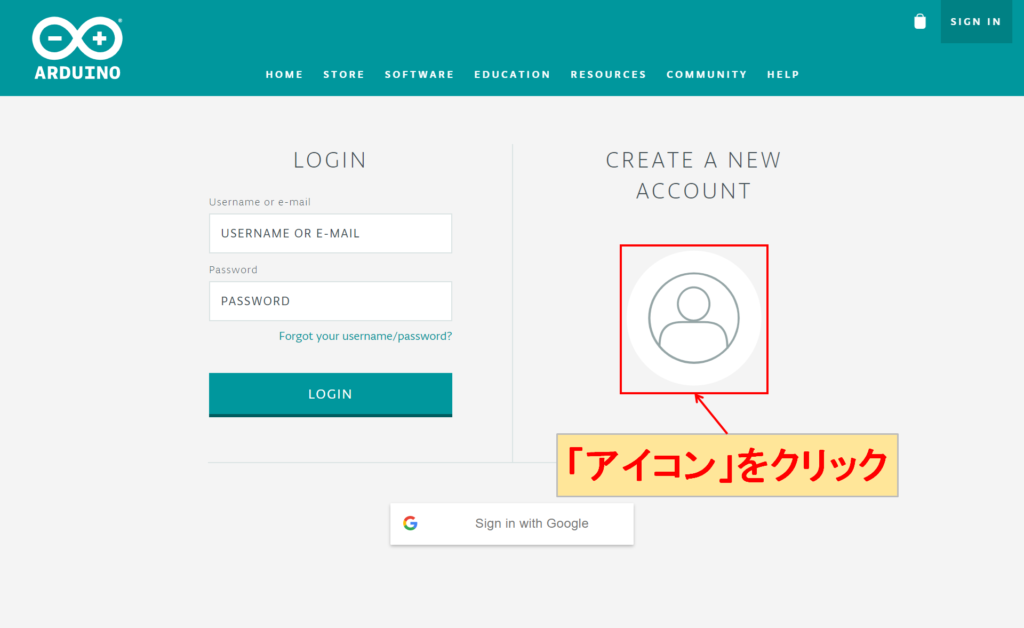
画面右の「CREATE A NEW ACCOUNTのアイコン」をクリックします。すでにArduinoアカウント作成が完了している場合は、画面左側で、「Username(e-mail)」と「PASSWORD」を入力して、「LOGIN」をクリックしてログインします。
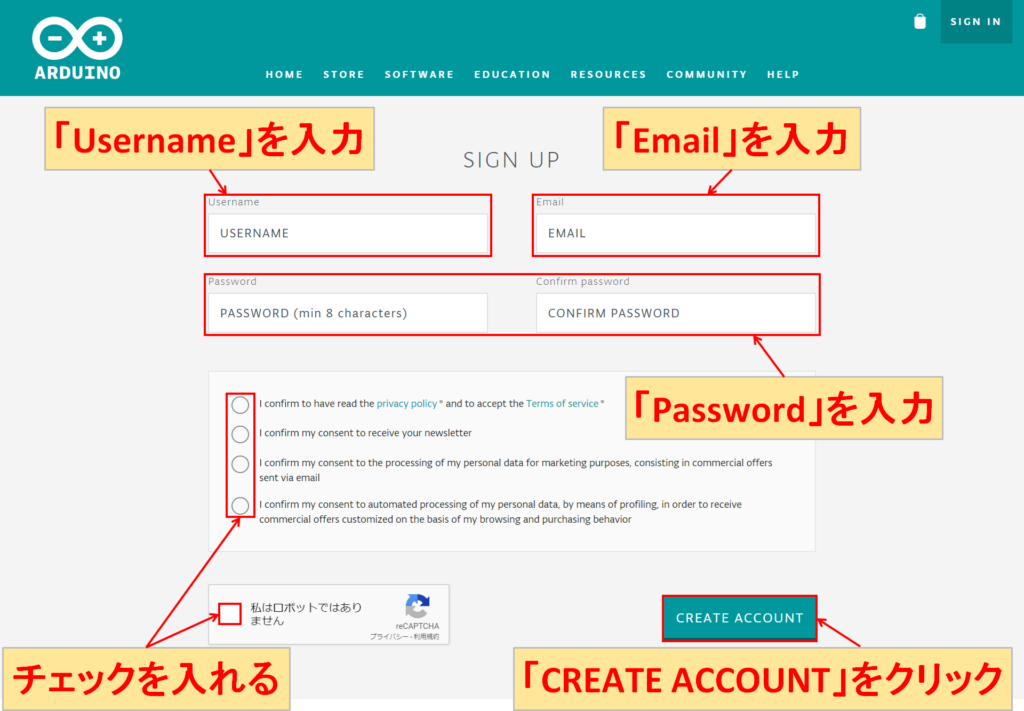
「Username」、「Email」、「Password」を入力して、必要な箇所にチェックを入れます。最後に「CREATE ACCOUNT」をクリックします。

正しく必要事項が入力できていれば、上記のような画面に切り替わります。
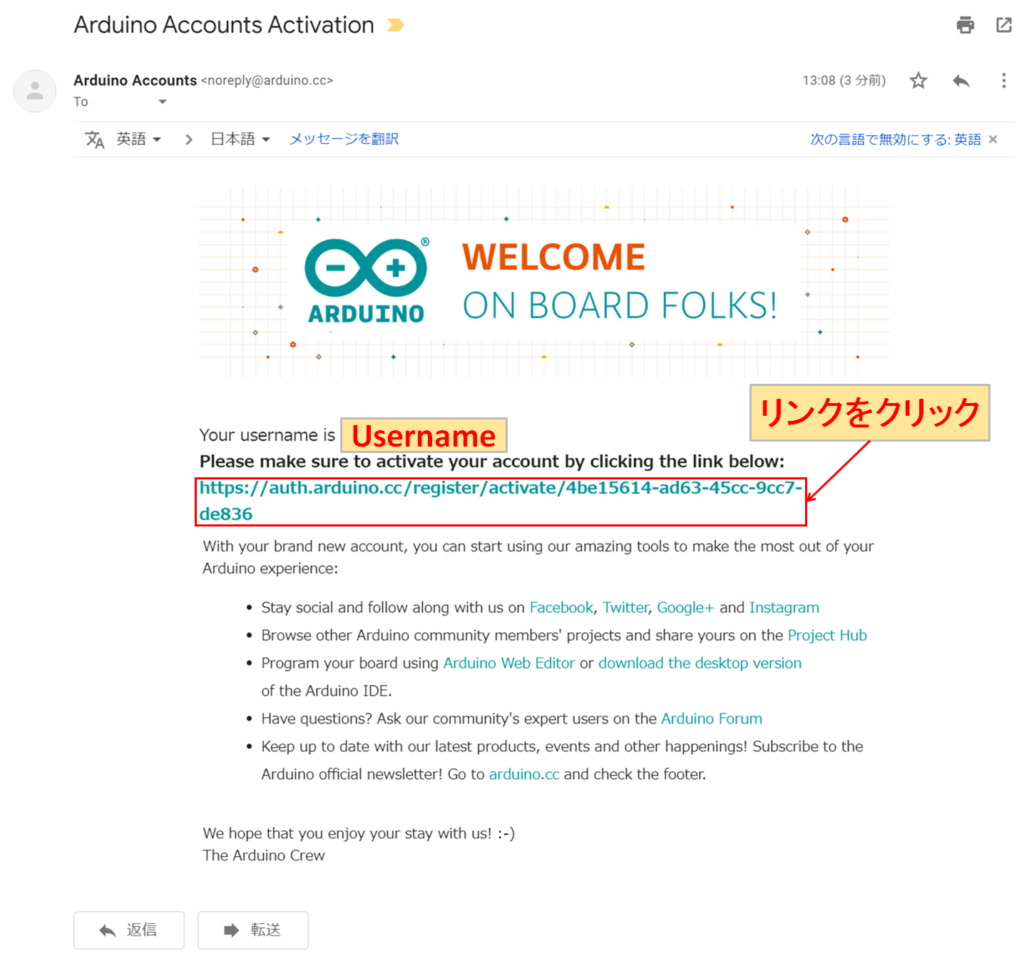
先程、入力したメールアドレスにArduino公式WEBサイトから上記のようなメールが送られてきます。メールに記載されているリンクをクリックすれば、Arduinoアカウント作成が完了します。
Arduino Pluginのダウンロード・インストール
Arduino Pluginのダウンロード

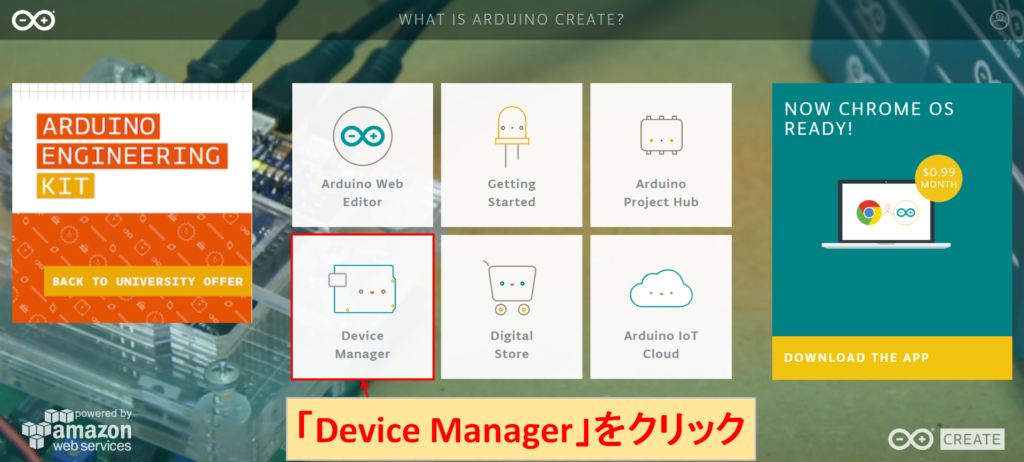
「SOFTWARE」-「ONLINE TOOLS」をクリックします。
左下のアイコンの「Device Manager」をクリックします。
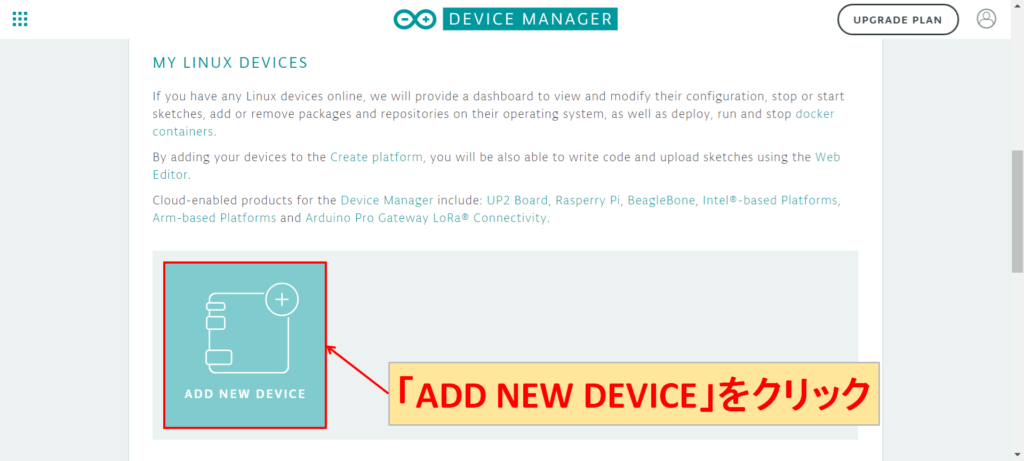
画面を下にスクロールして、「ADD NEW DEVICE」をクリックします。
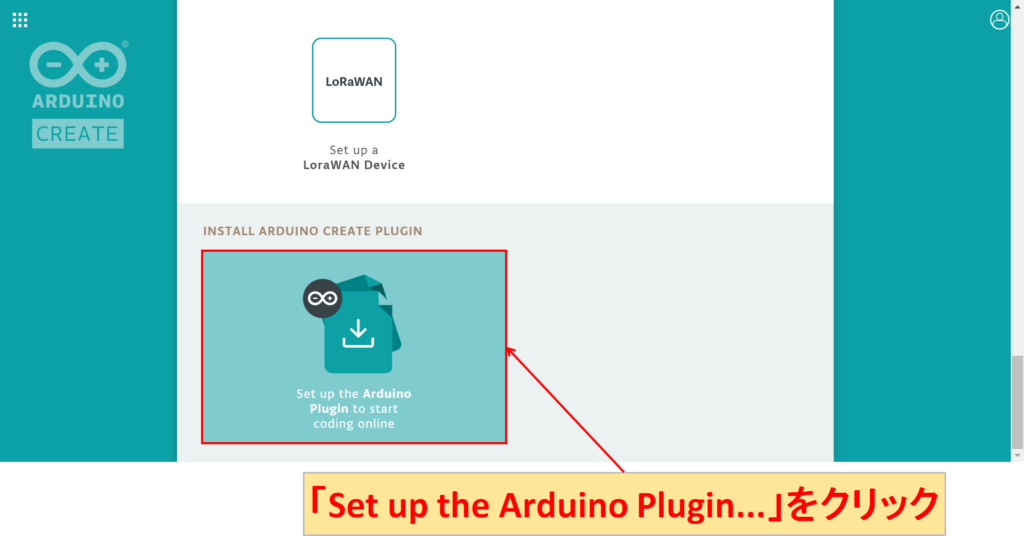
画面を下にスクロールして、「Set up the Arduino Plugin…」をクリックします。
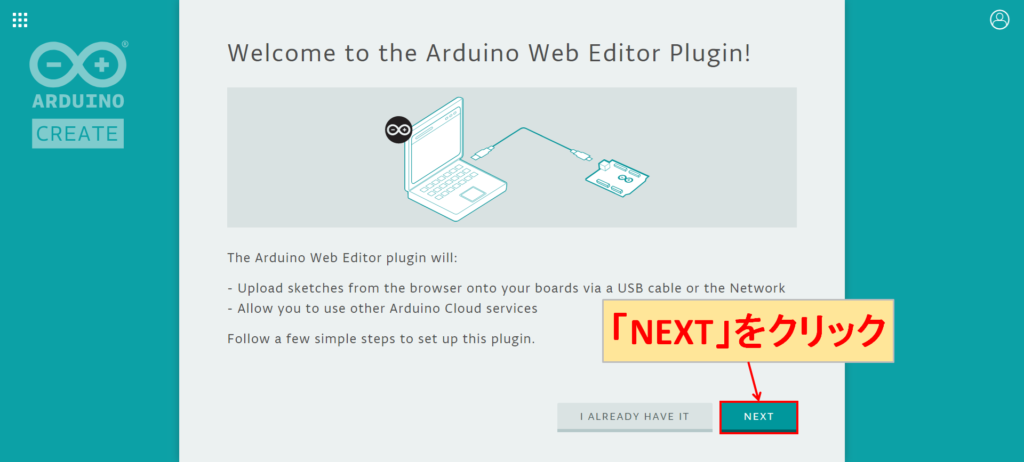
「NEXT」をクリックします。
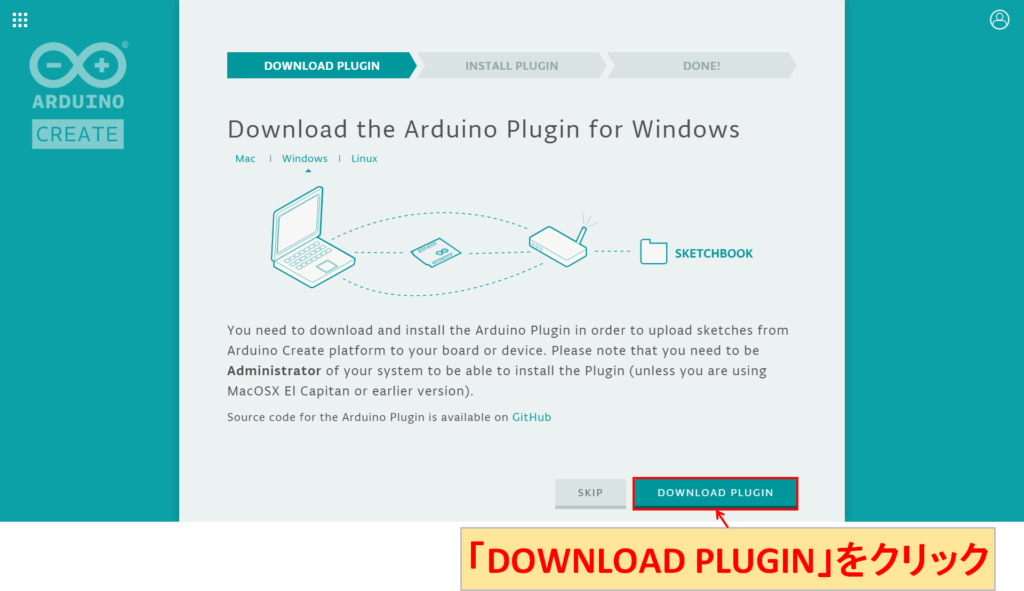
「DOWNLOAD PLUGIN」をクリックします。
Arduino Pluginのダウンロードが開始されるので、ダウンロードが完了するまでしばらく待ちます。
Arduino Pluginのインストール

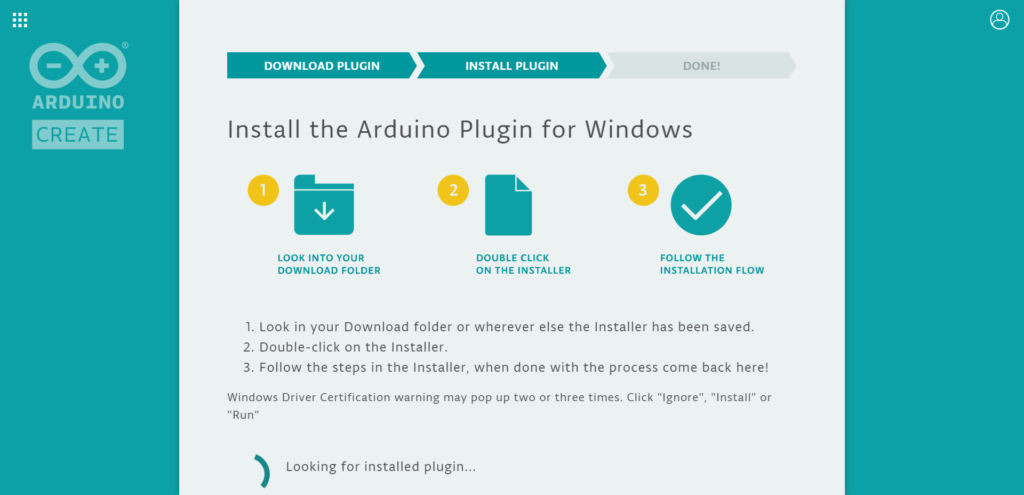
ダウンロードした実行ファイル(exeファイル)をダブルクリックしてインストーラを立ち上げます。
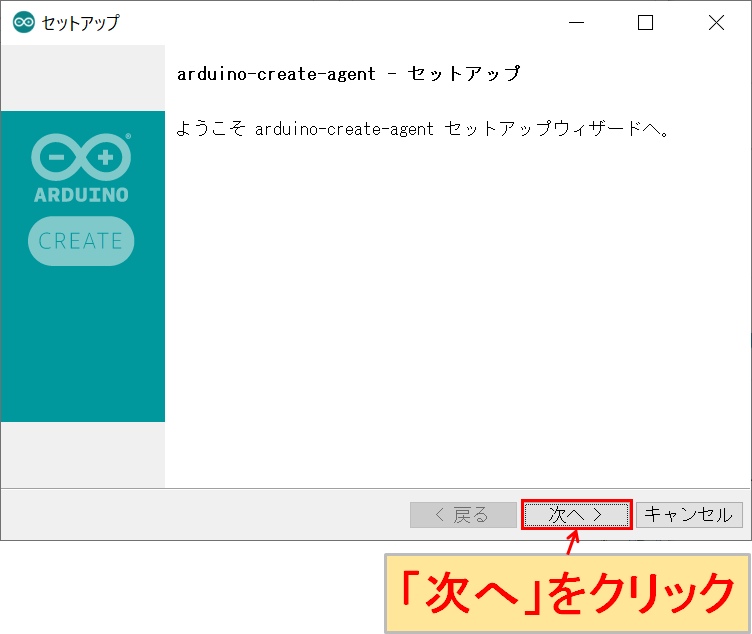
インストーラが立ち上がったら、「次へ」をクリックします。
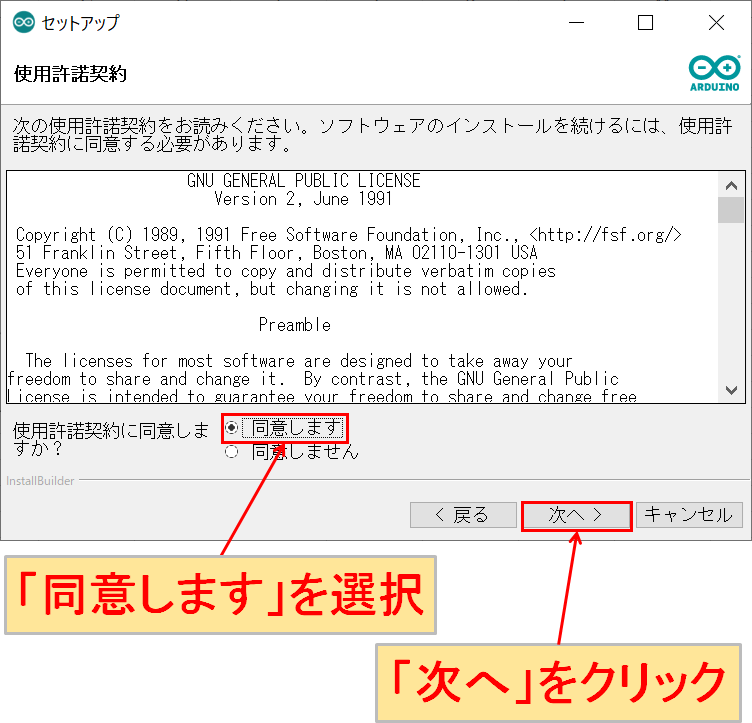
「使用承諾契約に同意しますか?」で「同意します」を選択して、「次へ」をクリックします。
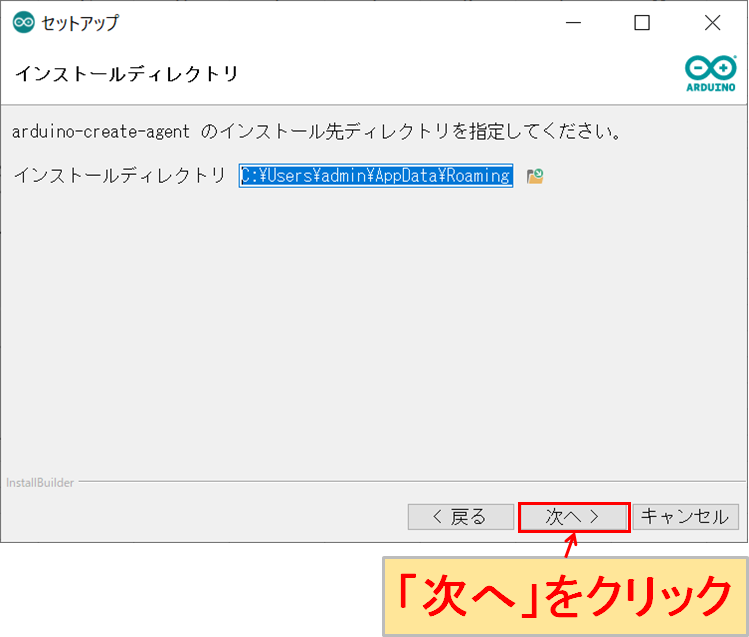
インストール先のディレクトリを指定して、「次へ」をクリックします。
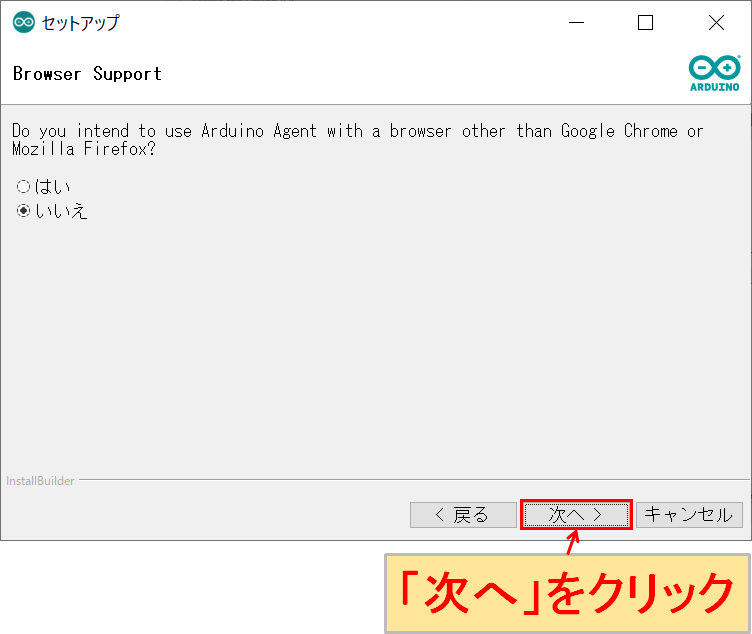
「次へ」をクリックします。
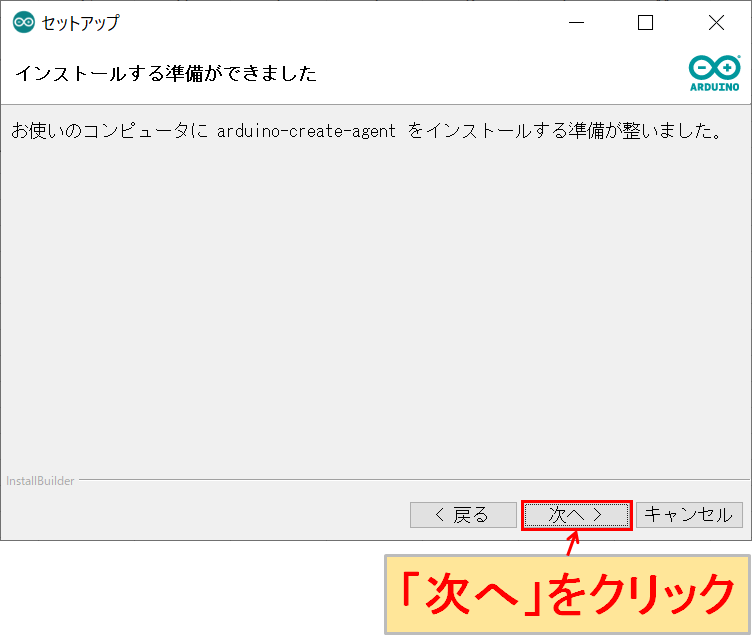
「次へ」をクリックします。
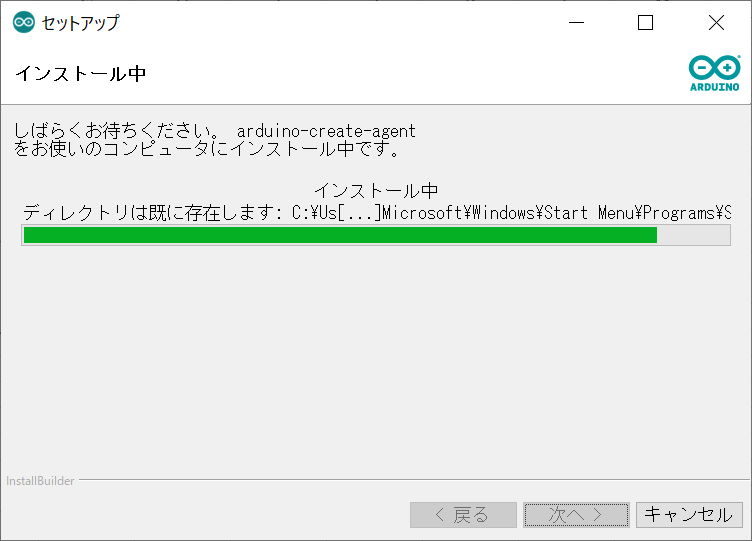
インストールが開始されるので、そのまま完了するまで待ちます。
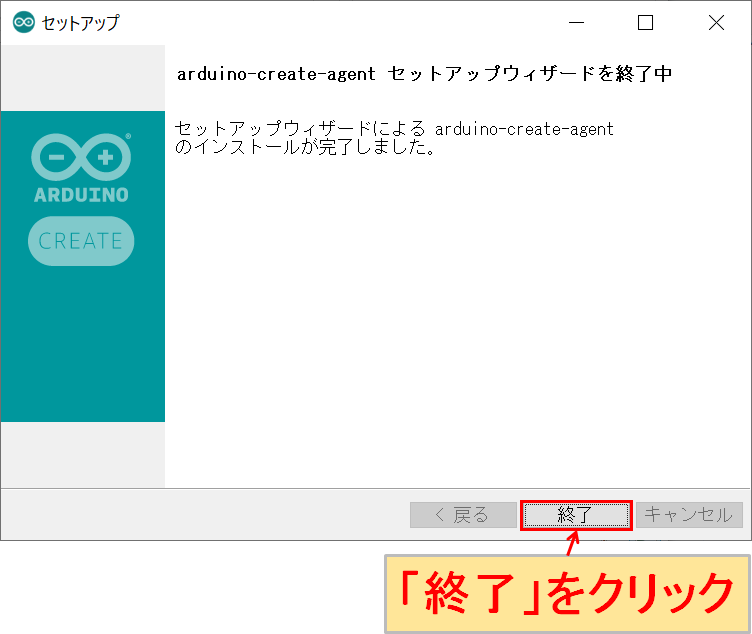
インストールが完了したら、「終了」をクリックします。

ドライバをインストールするのか聞かれるので、そのまま「はい」をクリックします。

Arduino公式WEBサイトに戻ると、上記の画面に切り替わっています。また、自分のPC画面のタスクバーにArduino Pluginのアイコンが表示されていることを確認します。
プログラムの書き込み
Arduino Pluginのインストールが完了したら、試しにサンプルスケッチ(サンプルプログラム)を書き込んでみたいと思います。
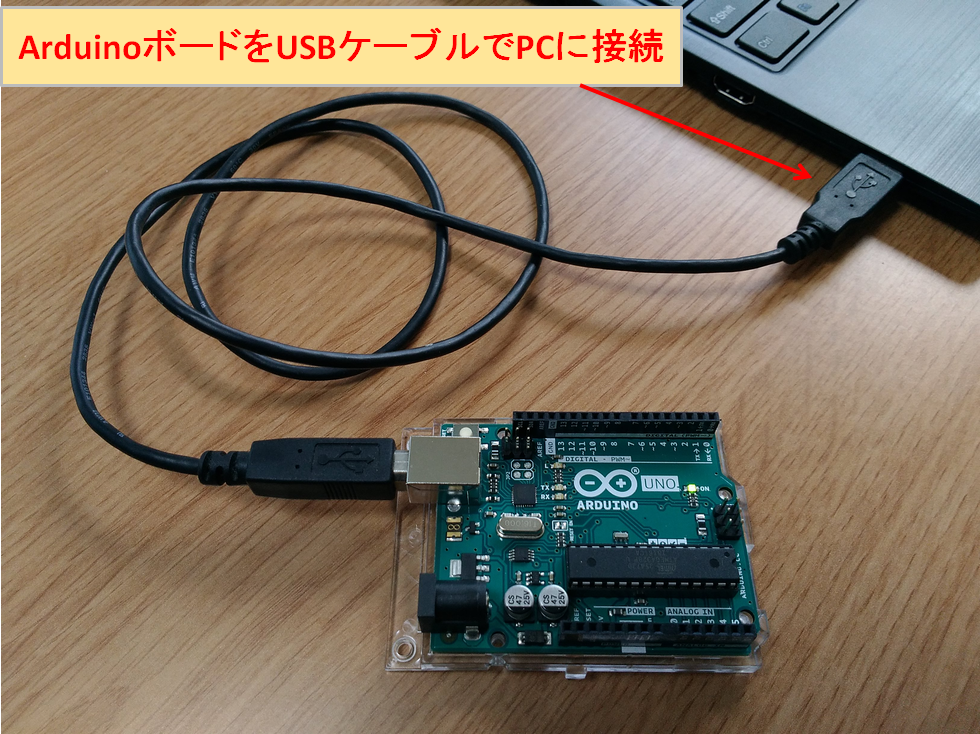
ArduinoボードをUSBケーブルで、Arduino IDEを使用するPCに接続します。当記事では、Arduino Unoを使用して説明していきます。
以下の記事で初心者でもわかりやすいように、ランキング形式でおすすめのArduinoボードを紹介しているので、ぜひご覧ください。
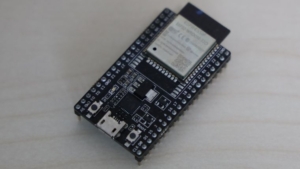
また、以下の記事で、安価でWi-Fi/Bluetoothに対応している「ESP32開発ボード」についてもまとめてみました。
このボードは、Arduinoボードではありませんが、Arduino IDEでソフト開発ができるため、電子工作でIoTを実現したい方におすすめです。
先程の「Plugin correctly installed!」の画面で「NEXT」をクリックすると、Arduino Web Editorの画面に切り替わります。
また、次回からはログイン後、「SOFTWARE」-「ONLINE TOOLS」をクリックして、さらに「Arduino Web Editorのアイコン」をクリックすると、Arduino Web Editorの画面に切り替わります。
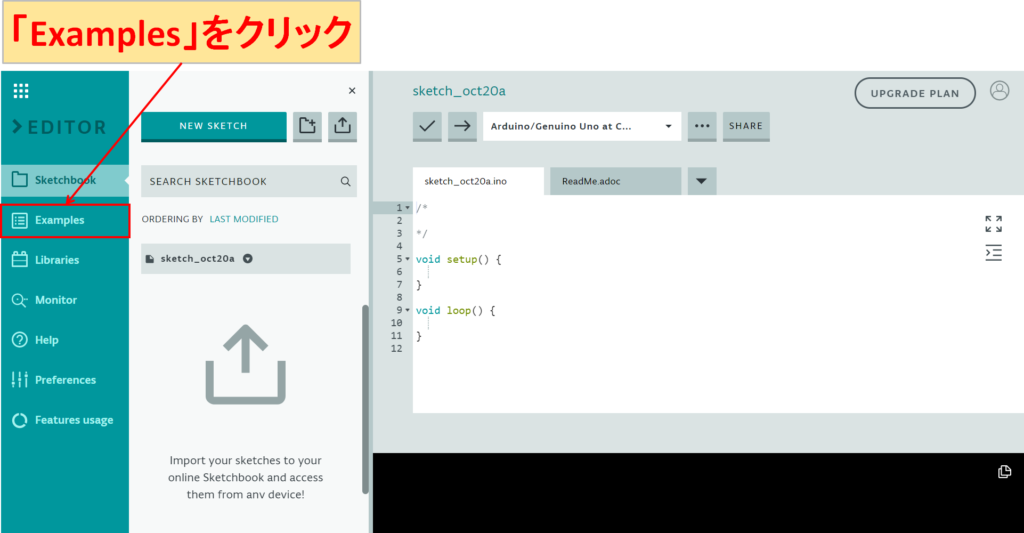
「Examples」をクリックします。
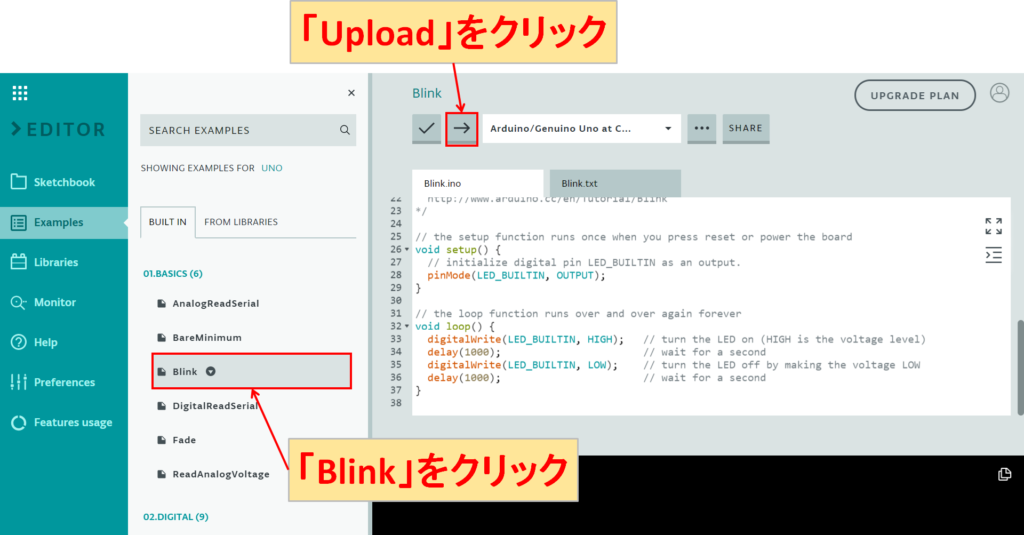
「BASICS」内の「Blink」をクリックすると、右側の画面にスケッチ(プログラム)が表示されるので、「Upload」をクリックします。
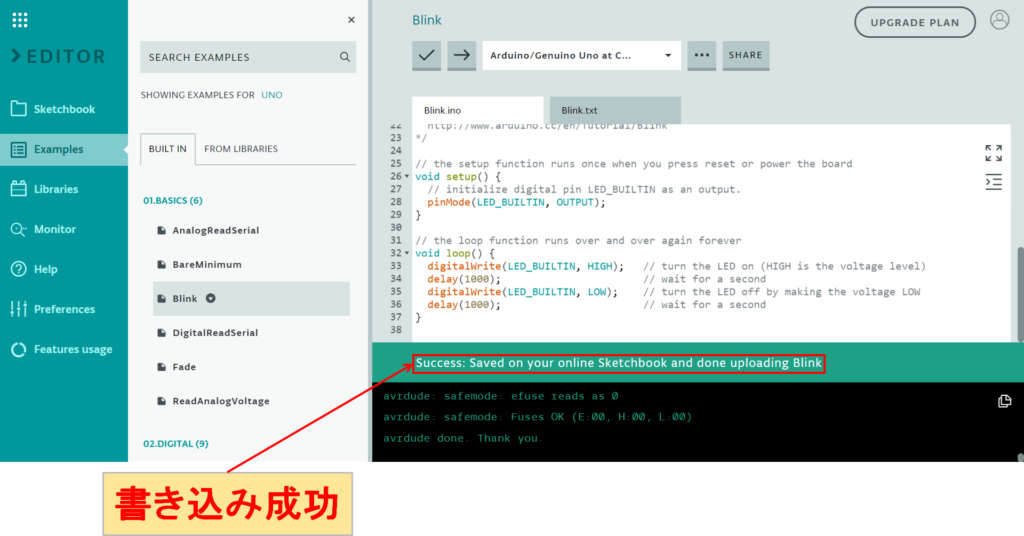
スケッチがArduino Unoに書き込まれると、「Success(成功)」と表示され、Arduino UnoのLEDが1秒間隔で点滅します。